Difference between revisions of "Solenoid Operations"
(→EPICS Interface) |
(→EPICS Interface) |
||
| Line 49: | Line 49: | ||
# in the "Main Action Bar" GUI, in "MAGNETS" section, click "Solenoid" button | # in the "Main Action Bar" GUI, in "MAGNETS" section, click "Solenoid" button | ||
| − | note1: [http://mobaxterm.mobatek.net/download-home-edition.html MobaXterm] is recommended for Windows users. | + | ''note1'': [http://mobaxterm.mobatek.net/download-home-edition.html MobaXterm] is recommended for Windows users. |
| − | note2: if neither "Main Action Bar" or "Solenoid Main Menu" are shown, click the short cuts in the CSS menu to bring them up | + | |
| + | ''note2'': if neither "Main Action Bar" or "Solenoid Main Menu" are shown, click the short cuts in the CSS menu to bring them up: | ||
| + | |||
[[File:Solenoid_Screen_shortcut.png]] | [[File:Solenoid_Screen_shortcut.png]] | ||
Revision as of 09:05, 29 July 2014
Contents
The Solenoid Magnet
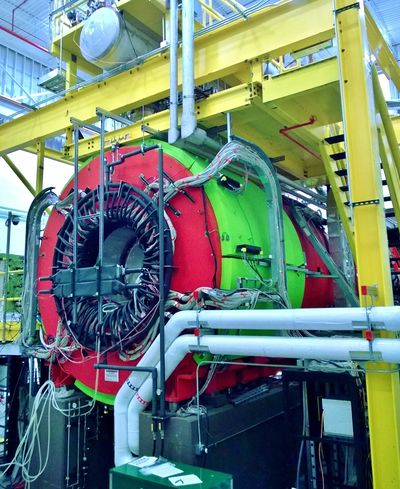
The principle analysis magnet for the GlueX spectrometer is a superconducting solenoid made from the Large Aperture Solenoid Spectrometer (LASS) solenoid built at Stanford Linear Accelerator Center (SLAC) in 1971. The LASS solenoid consists of four separate coils located in separated vacuum vessels. Three coils were later used a second time for the Muon decays into Electron and GAmma ray (MEGA) experiment at Los Alamos National Lab from 1993 through 1995. During the MEGA experiment, the coils had electrical shorts and leaks to the insulating vacuum along with deteiorated superinsulation and instrumentation. In order to use them for the GlueX experiment, all four LASS coils have been extensively repaired, refurbished and tested at Jefferson Lab. The four coils were then assembled in Hall-D. The final GlueX solenoid has a bore of 1.85~m and measures 4 m long.
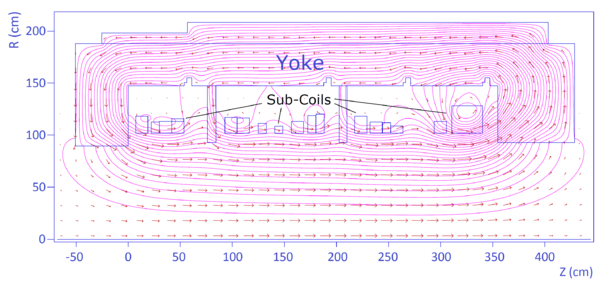
The magnet consists of 4608 windings(turns) of conductor in total. The windings are grouped into 19 sub-coils and distributed in four coils. The conductor is made of two copper bars 7.62 mm wide and about 2 mm thick, with a band of about 1~mm thick NbTi superconductor composite soldered in between them. These double-pancake windings are not insulated at their sides and are separated by a 0.64 mm thick stainless steel band co-wound with the cable, and insulated from the cable on both sides by Mylar bands of 0.2 mm thick.
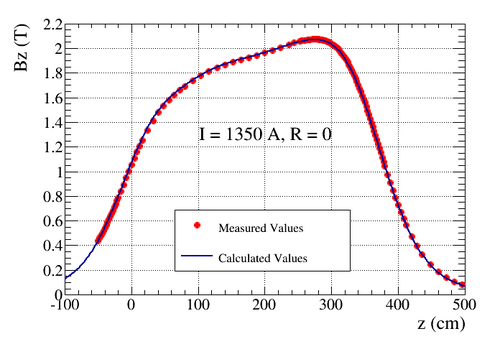
When powered with the maximum current of 1350 A, the solenoid generates a field close to 2 Tesla in the bore. The full inductance of the solenoid is about 26 H.
Routine Operation
As the superconducting solenoid is very complex system, the operation of such system requires a lot of knowledge and experiences. The commissioning, troubleshooting, tuning of ground fault and quench detectors, Power ON and OFF, change current will be conducted by authorized experts only.
The responsibilities of the shift workers include:
- Monitor the overall status of the solenoid: current, field, interlocks, voltages, cryo levels etc.
- Notify experts when anomalies happen.
EPICS Interface
The solenoid GUI can be opened from the Hall-D's main EPICS GUI. If not opened, follow these steps:
- if offsite or using a person computer, log on to JLab's Login Gateway: ssh yourusername@login.jlab.org
- if not already in the device network, log on to the Hall Gateway (hallgw): ssh yourusername@hallgw, use your two-step crytocard to generate passcodes.
- log on to gluon30 with account hdops: ssh hdops@gluon30
- type css to bring up the EPICS GUIs
- select ".../Solenoid" as Workspace
- in the "Main Action Bar" GUI, in "MAGNETS" section, click "Solenoid" button
note1: MobaXterm is recommended for Windows users.
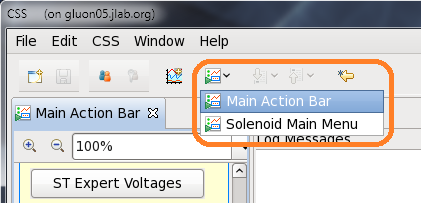
note2: if neither "Main Action Bar" or "Solenoid Main Menu" are shown, click the short cuts in the CSS menu to bring them up:
known issues
- If an error message appears in the opened view and reads "Could not create the view: null argument", close the view and try to open it again. The problem should be solved by doing so.
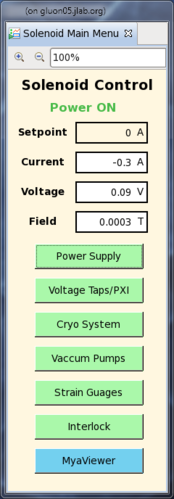
Main Menu
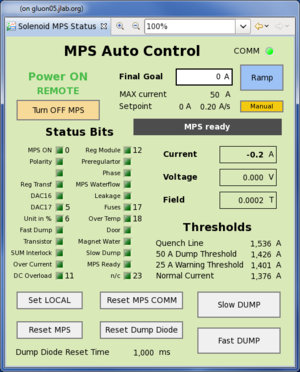
Power Supply
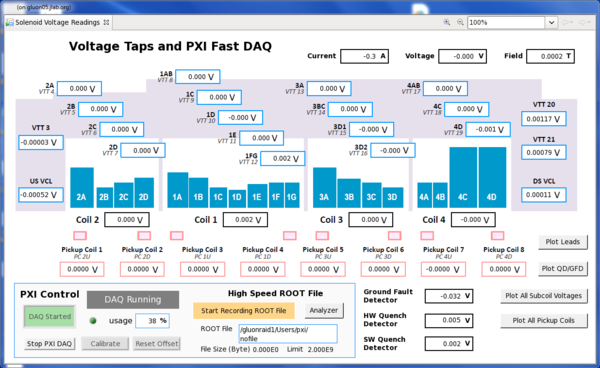
Voltages
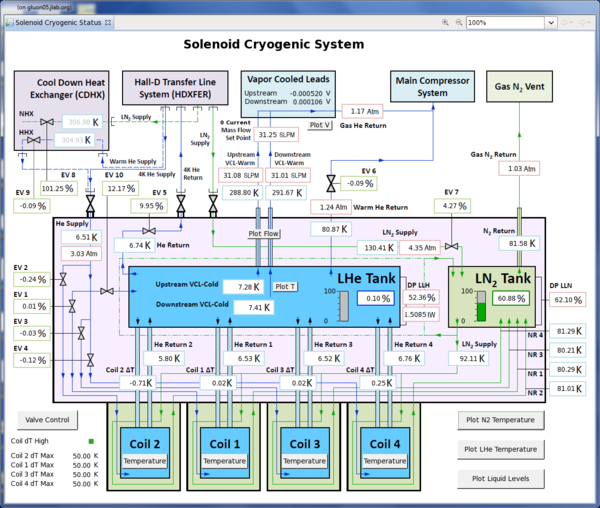
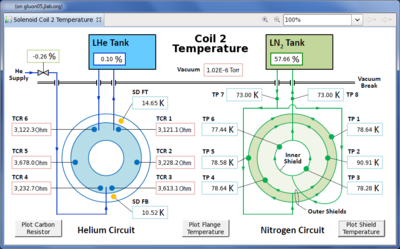
Cryogenic System
Coil Temperature
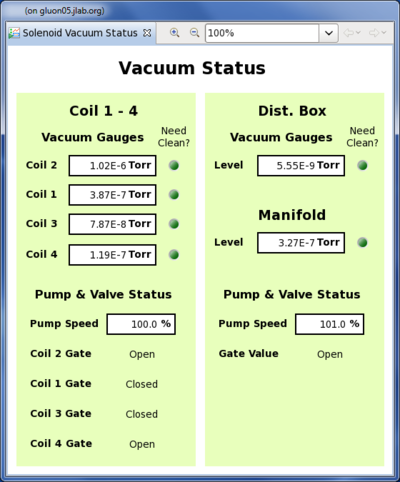
Vacuum System
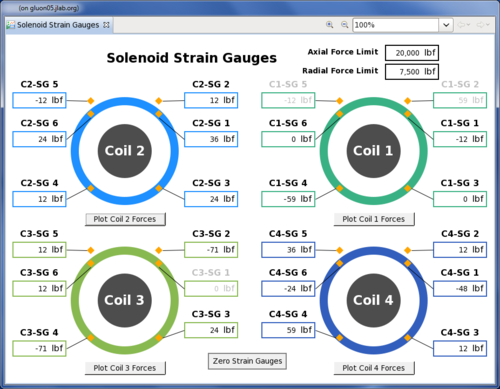
Strain Gauges
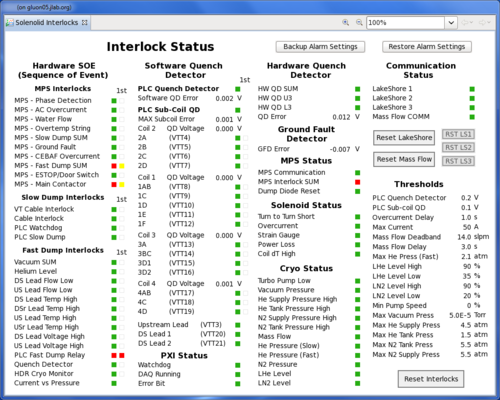
Interlock
Expert personnel
The individuals responsible for checking that the solenoid is ready to take data and setting its operating parameters are shown in following table. Problems with normal operation of the solenoid should be referred to those individuals and any changes to their settings must be approved by them. Additional experts may be trained by the system owner and their name and date added to this table.
| Name | Extension | Date of qualification |
|---|---|---|
| George Biallas - Solenoid | 269-7535 | June 12, 2014 |
| Yi Qiang - Solenoid/PXI | 269-7237 | June 12, 2014 |
| Mark Stevens - Power Supply | 269-6383 | June 12, 2014 |
| Jonathan Creel - Cryogenics | 269-5925 | June 12, 2014 |
| Dave Butler - PLC | 329-2583 | June 12, 2014 |
